Acclimating freshwater fish is much simpler than most people think. By knowing how to acclimate fish, you actually end up acclimating fish much faster than most people believe. Properly acclimating new fish to your already established tank wants more than the simple bag lift method. Maximum people who have fish tanks otherwise aquariums of any style have heard of floating the bag having the new fish in your aquarium water, nevertheless, that is only a section of what you should do to properly add new acclimate fish to a brand new environment. Acclimation, when done correctly, can greatly reduce stress and stress-related diseases in new fish. One of the best and probably the safest process to acclimate fish is acclimating your fish over a period of weeks in a quarantine tank (QT). Not only does this allow the acclimate fish to be separated so you can check for diseases but it also gives a perfect chance to slowly raise or lower the SG over a period of weeks which is the most recommended way of doing it. The next best method is The Slow Drip method and then there’s The Bag method. Regardless of the method you choose, each one allows your new additions to adjust to four basic things that cause stress: Lack of O2 (oxygen), drastic pH and temperature differences, and ammonia build up in the bag. Both pH and water temperature affect how much of the toxic form of ammonia is present in your water. Higher pH and higher temp result in a higher proportion of the total ammonia being present in its toxic form. PH has the largest effect on ammonia toxicity. So if you have low pH and low temps, higher total ammonia can be present without it being as toxic as at higher pH and temps.
Three Ways to Acclimate Fish
Floating Method
STEP 1:
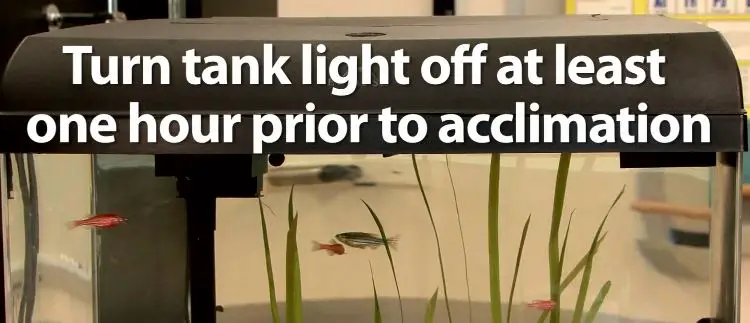

Firstly, you should turn off the aquarium lights.
STEP 2:
Decrease or dim the lights in the room where the box will be opened. Not ever open the box in bright light or it will stress or trauma may result from sudden exposure to bright light.
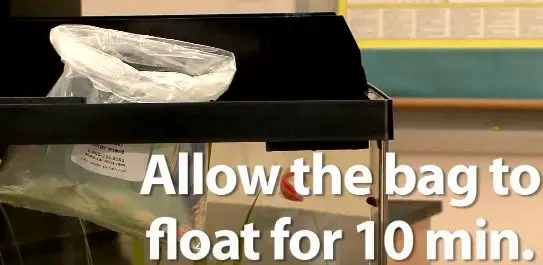
STEP 3:

Float the sealed bag in the aquarium for 20 minutes. You should never open the shipping bag at this time. This step helps in adjusting the temperature of the water in the shipping bag gradually to the temperature in the aquarium while maintaining a high level of dissolved oxygen.
STEP 4:
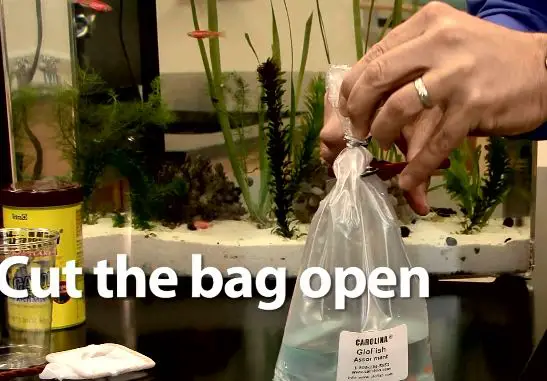
After the skimming procedure the fixed transporting pack for 25 minutes, cut open the sack simply under the metal clasp and roll the best edge of the pack down one inch to make an air take inside the lip of the sack. This will empower the pack to drift on the surface of the water. For substantial bits of coral that will dive the delivery sack, put the pack containing the coral in a plastic bowl.
STEP 5:
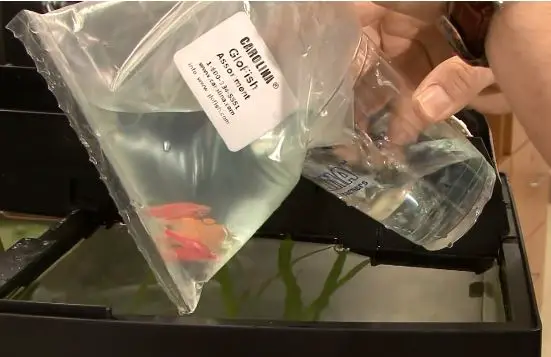
Add half a cup of aquarium water to the shipping bag and follow the following step.
1. Repeat step 5 every four minutes until the shipping bag is full.
2. Lift the shipping bag from the aquarium and drain half the water from the shipment bag and again repeat step 5.
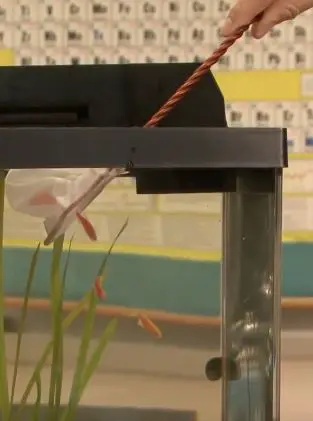
3. Net aquatic life from the shipping bag and release into the aquarium.
4. Remove the filled shipping bag from the aquarium and discard the water. Never release shipping water directly into the aquarium.
Drip Method
STEP 1:
Start with Steps 1-3 of the floating method to acclimate water temperature so that temperature remains moderate.
STEP 2:
In this step you need to carefully pour the content of the packet with the water into the jar or buckets, you must make sure, not to expose invertebrates to the air. Contingent upon the measure of water in each bag, this may require tilting the container at a 45-degree edge to ensure the fish are completely water-logged, i.e. completely submerged. You may require a prop or cut to help hold the bucket in this situation until there is sufficient fluid in the container to return it to a level position.
STEP 3:
Utilizing airline tubing, set up and run a siphon drip line from the primary aquarium to each bucket. You’ll require airline tubing to be separated for each container. Tie a few knots in the airline tubing or add airline controller valve to regulate water from the main tank to the bucket. It is likewise a smart method to secure the airline tubing set up with an airline holder.
STEP 4:
Begin a siphon by sucking on the end of the airline tubing you’ll be placing into each of the buckets. When water begins flowing through the tubing adjust the drip by tightening one of the knots or else adjusting the maintain valve to a rate of 3-4 drips per second.
STEP 5:
Once the water measurements in the bucket doubles remove half and initiate the drop again until the volume doubles once more after some time.
STEP 6:
Now, you can transfer your fish to the aquarium. Sponges, shellfishes, and gorgonians should never be exposed directly to air. Slowly scoop them out of the bucket with the fish packet, ensuring they’re completely submerged in water. Now submerge the packet in the aquarium and gently remove the fish from the bag. Next, close the packet submerged in the aquarium and remove the bag from the aquarium. Dispose of both the packet and the enclosed water. A small measure of the diluted water will escape into the aquarium, this is ok.
Using a Quarantine Tank
STEP 1:
Get your tank. A quarantine tank is significant as it keeps a fish away from the rest of your aquarium fish. It is highly recommended you use a quarantine tank earlier acclimating your fish before you transfer your new fish to your main aquarium. Because, if an acclimated fish you bought is sick then you do not want the infection to spread to all parts of your tank. After buying a new fish you should also purchase another tank to use as a quarantine tank.
STEP 2:
Installing a filtration system should be done immediately. Your quarantine tank should have some kind of filtration system. This will keep your acclimate fish safe as well as healthy during the quarantine period. If your tank does not have a built-in filtration system then purchase a filtration system at a local pet shop.
STEP 3:
Adding a heater. This will keep the water at a safe temperature for your fish. You should have a thermometer to record the temperature. You want to make sure the temperature is harmless before transferring your fish to the quarantine tank. An aquarium may have a built-in heating system. If yours does not have a heater then you can buy one at a pet store. The proper temperature depends on the type of fish you have.
STEP 4:
Fill the aquarium with water from your main tank. The quarantine tank should be comparably same as your regular tank. When your acclimated fish is ready to be transferred to the regular tank, you want the change to be as smooth as possible.
Take water from your main tank, using a bucket otherwise cup, and fill up your quarantine tank.
After the quarantine tank is filled then you can turn on the heater as well as the filtration system.
STEP 5:
Monitor your fish for 3 to 4 weeks in the quarantine tank. Watch your fish carefully during this time. Before introducing a acclimate fish to a tank of other aquatic life, you want to make sure it does not have any diseases.
Common infections include things like Ammonia Poisoning, Fin Rot, Fish Fungus, and Oxygen Starvation. Usually, you should treat infections with antibiotics. Antibiotics may be directed to a fish’s tank, otherwise, you may give your fish food with antibiotics.
STEP 6:
Repeat the floating process to transfer the acclimate fish to the regular tank. If three to four weeks pass without incident, you can transfer your acclimated fish to the regular tank. You would repeat the same floating procedure you used to acclimate your fish to the quarantine tank. You will have to net your acclimated fish as well as place it in a bag filled with water from the quarantine tank. Make sure to close tightly the bag with a metal clip or rubber band.
How long do you have to acclimate fish?
Using a 1/2 cup evaluating cup dip 1/2 cup of tank water from the tank and add it to the bag. Now wait 15 minutes and do it again. With a .9 difference like the one we mentioned beforehand, you will need to do this every 20 minutes for at least 2 hours.
That is eight times before you net them out and release them in the community tank. This guarantees that the water is very slowly changed from their bag pH to your tank pH without any sudden shock to their little fishy systems. Continuously follow the acclimation procedure even if your acclimate fish arrival seems to be dead. Some acclimate fish, as well as invertebrates, can appear as though they are dead when they arrive. By no means don’t place an airstone into the shipping bag when acclimating your new arrival. How long do you have to acclimate fish will give information to increase the pH of the shipping water too quickly and expose your new arrival to lethal ammonia. Keep aquarium lights off for at minimum four hours after the new arrival is presented into the aquarium.